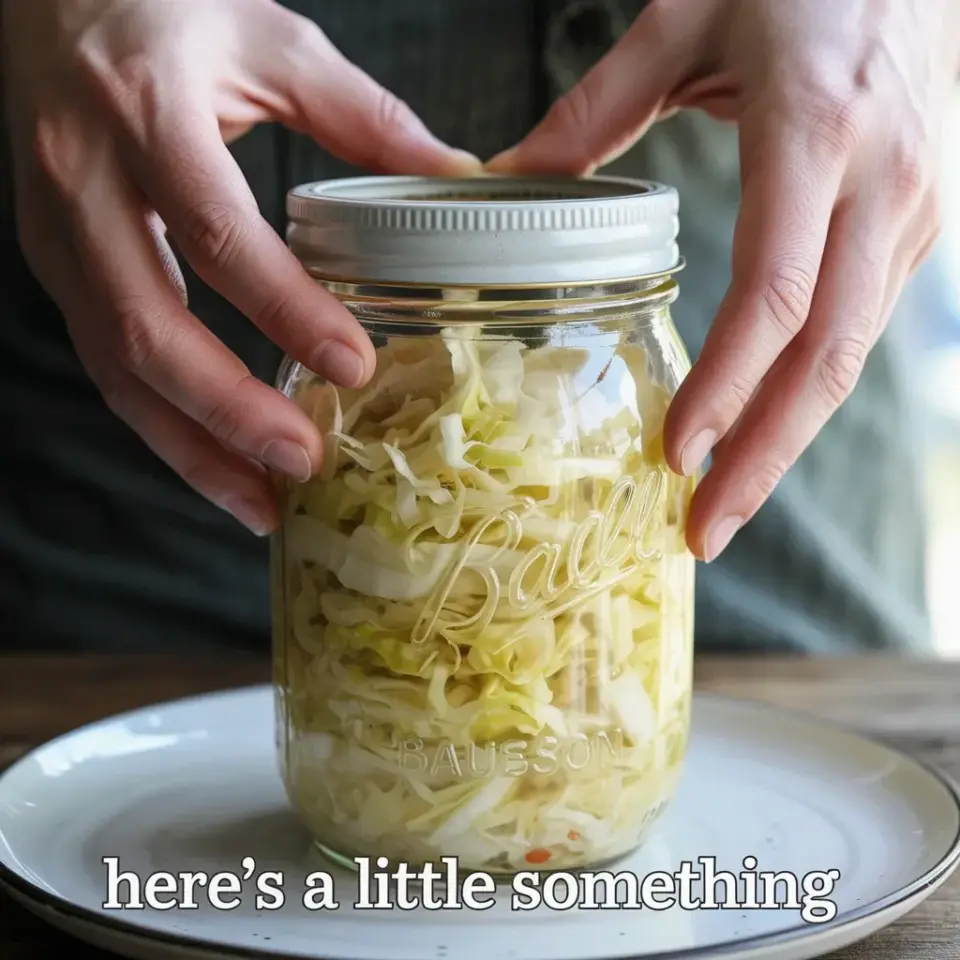
A clear mason jar, pale yellow shreds packed tight to the shoulder, and the faint, sharp smell of something alive. My hands are wrapped around the lid in the photo, and honestly, I look a little proud. That jar of homemade sauerkraut was just cabbage and salt, but the transformation felt like a small miracle. This batch turned out perfectly tangy and crunchy, and I kinda can’t stop snacking on it. If you have been staring at a head of cabbage wondering if you could pull this off, this is your sign to just try it.
The process is ridiculously simple. You pack cabbage with salt, wait a few days, and let the invisible world of lacto-fermentation do the heavy lifting. But the details matter, and the difference between a sad, mushy pile of leaves and a vibrant, probiotic-rich condiment is in the little choices. Let me walk you through what happens before and after, and exactly how to get that perfect mason jar batch.
Why Cabbage and Salt Are the Whole Trick
You do not need a fancy crock, a special weight set, or a starter culture. You need a head of cabbage, some good salt, and a clean glass jar. The magic is in the natural sugars and bacteria already living on the cabbage leaves.
Salt does two specific jobs here. It pulls water out of the cabbage to create a brine, which is the liquid that covers the shreds and keeps oxygen out. It also creates an environment that is perfect for lactic acid bacteria to thrive, while killing off the stuff that would cause spoilage. It is a selective filter, and it is incredibly effective.
My first attempt used too little salt and I got a bit of mold on the top. Not gonna lie, it was disheartening. The fix was simply weighing my cabbage and salt with a kitchen scale. It is the difference between a wild guess and a reliable, crunchy result.
Picking the Right Cabbage for Fermenting
Grab a green cabbage that feels heavy for its size. The heavier it is, the more moisture it holds, and moisture is your friend here. You want tight, dense leaves that will slice into nice, firm ribbons.
I have fermented red cabbage too, and it is stunning in the jar, all deep purple and pink. But for that classic pale yellow look, the kind you see in my photo, you want the standard green variety. Organic is great if you can find it, simply because it hasn’t been treated to resist the very bacteria you are trying to cultivate.
One thing that surprised me? Removing the thick, outer leaves is not just about cleanliness. Those tough leaves are perfect for placing on top of the shredded cabbage as a natural barrier against the air. It is a little trick that saves you from buying plastic weights.
The Mason Jar Setup and the Brine Problem
You want a jar that is clean, but not necessarily sterile. A thorough wash in hot, soapy water is enough for me. I use a wide-mouth quart jar because it is easier to pack the cabbage down and get my hand inside to press firmly.
The main issue new fermenters face is keeping the cabbage submerged. If it floats, it will come into contact with oxygen, and oxygen leads to mold. Here is the thing: you do not need a fancy airlock system. A simple glass weight or a small, clean rock wrapped in a cabbage leaf works wonders.
After you pack the salted cabbage into the jar, press it down with your fist. Press hard. You should see liquid rise above the level of the cabbage. If you do not see enough liquid after a few minutes, you can add a little bit of filtered water to top it up. This is the “before” picture, the moment your ferment begins.
Day by Day: What Homemade Sauerkraut Looks Like
Day one is mostly quiet. The jar sits on your counter, and the brine starts to look cloudy. By day two, you might see tiny bubbles forming around the edges. That is the yeast and bacteria starting to exhale carbon dioxide, a sign that everything is on track.
Day three is when the magic becomes visible. The color shifts from bright green to that pale, translucent yellow you see in my jar. The bubbles become more active, and the smell starts to change from “salad” to something more tangy and complex. It is at this point that you should start taste-testing.
Do not skip the tasting. It is the only way to know what you like. Some people prefer a mild ferment at day five, others like it deeply sour at day fourteen. The flavor develops fast, so once it hits that perfect balance of tart and crunchy, move the entire jar into the fridge. The cold slows the fermentation down to a near standstill, preserving the texture.
When Is It Done and How to Store It
The sauerkraut is done when it tastes good to you. That is the whole rule. There is no magical deadline. For me, it is usually between day seven and day ten, when the crunch is still firm but the raw cabbage edge is gone.
You are looking for a few visual cues of success. The brine should be cloudy, not slimy. The color should be uniform, and the shredded cabbage should still have its structure. If you see a little bit of white film on top, that is kahm yeast, which is harmless but can taste slightly metallic. Just scrape it off.
Once refrigerated, your mason jar batch will keep for months. Honestly, it gets better with age. If you press it down well and always use a clean fork to grab a portion, it will stay crunchy and bright. Just remember that the jar will continue to build pressure, so burp it once a week by opening the lid to release any gas.
The Brass Tacks of Probiotics
Everyone wants to talk about the gut health benefits, and they are real. The lacto-fermentation process creates live probiotics, which are the good bacteria that your digestive system loves. A couple of forkfuls a day is a genuinely useful addition to your diet.
But I am not here to sell you a miracle cure. This is food, not medicine. The probiotic count in a fresh, unpasteurized batch of sauerkraut is far higher than anything you will find on a shelf, and the fact that it is absurdly cheap to make is a perk. It is my favorite way to add a little tang to a sandwich or a grain bowl.
One weird but effective tip I picked up? Freeze some of the brine from a successful batch. When you start your next batch of cabbage, use that liquid as a starter. It accelerates the process and gives the new batch a flavor boost. It is like planting a flag for your specific house bacteria, and it gives every new ferment a head start.
So, go find a cabbage and a mason jar. Pack it tight, trust the salt, and give it time. The result is a crunchy, tangy, alive condiment that you made with your own two hands. I promise you, the first time you crack open that lid and hear that faint hiss of pressure release, you will be hooked. Try one jar, and you will see exactly why the humble cabbage is still the king of the fermentation world.A clear mason jar, pale yellow shreds packed tight to the shoulder, and the faint, sharp smell of something alive. My hands are wrapped around the lid in the photo, and honestly, I look a little proud. That jar of homemade sauerkraut was just cabbage and salt, but the transformation felt like a small miracle. This batch turned out perfectly tangy and crunchy, and I kinda can’t stop snacking on it. If you have been staring at a head of cabbage wondering if you could pull this off, this is your sign to just try it.
The process is ridiculously simple. You pack cabbage with salt, wait a few days, and let the invisible world of lacto-fermentation do the heavy lifting. But the details matter, and the difference between a sad, mushy pile of leaves and a vibrant, probiotic-rich condiment is in the little choices. Let me walk you through what happens before and after, and exactly how to get that perfect mason jar batch.
Why Cabbage and Salt Are the Whole Trick
You do not need a fancy crock, a special weight set, or a starter culture. You need a head of cabbage, some good salt, and a clean glass jar. The magic is in the natural sugars and bacteria already living on the cabbage leaves.
Salt does two specific jobs here. It pulls water out of the cabbage to create a brine, which is the liquid that covers the shreds and keeps oxygen out. It also creates an environment that is perfect for lactic acid bacteria to thrive, while killing off the stuff that would cause spoilage. It is a selective filter, and it is incredibly effective.
My first attempt used too little salt and I got a bit of mold on the top. Not gonna lie, it was disheartening. The fix was simply weighing my cabbage and salt with a kitchen scale. It is the difference between a wild guess and a reliable, crunchy result.
Picking the Right Cabbage for Fermenting
Grab a green cabbage that feels heavy for its size. The heavier it is, the more moisture it holds, and moisture is your friend here. You want tight, dense leaves that will slice into nice, firm ribbons.
I have fermented red cabbage too, and it is stunning in the jar, all deep purple and pink. But for that classic pale yellow look, the kind you see in my photo, you want the standard green variety. Organic is great if you can find it, simply because it hasn’t been treated to resist the very bacteria you are trying to cultivate.
One thing that surprised me? Removing the thick, outer leaves is not just about cleanliness. Those tough leaves are perfect for placing on top of the shredded cabbage as a natural barrier against the air. It is a little trick that saves you from buying plastic weights.
The Mason Jar Setup and the Brine Problem
You want a jar that is clean, but not necessarily sterile. A thorough wash in hot, soapy water is enough for me. I use a wide-mouth quart jar because it is easier to pack the cabbage down and get my hand inside to press firmly.
The main issue new fermenters face is keeping the cabbage submerged. If it floats, it will come into contact with oxygen, and oxygen leads to mold. Here is the thing: you do not need a fancy airlock system. A simple glass weight or a small, clean rock wrapped in a cabbage leaf works wonders.
After you pack the salted cabbage into the jar, press it down with your fist. Press hard. You should see liquid rise above the level of the cabbage. If you do not see enough liquid after a few minutes, you can add a little bit of filtered water to top it up. This is the “before” picture, the moment your ferment begins.
Day by Day: What Homemade Sauerkraut Looks Like
Day one is mostly quiet. The jar sits on your counter, and the brine starts to look cloudy. By day two, you might see tiny bubbles forming around the edges. That is the yeast and bacteria starting to exhale carbon dioxide, a sign that everything is on track.
Day three is when the magic becomes visible. The color shifts from bright green to that pale, translucent yellow you see in my jar. The bubbles become more active, and the smell starts to change from “salad” to something more tangy and complex. It is at this point that you should start taste-testing.
Do not skip the tasting. It is the only way to know what you like. Some people prefer a mild ferment at day five, others like it deeply sour at day fourteen. The flavor develops fast, so once it hits that perfect balance of tart and crunchy, move the entire jar into the fridge. The cold slows the fermentation down to a near standstill, preserving the texture.
When Is It Done and How to Store It
The sauerkraut is done when it tastes good to you. That is the whole rule. There is no magical deadline. For me, it is usually between day seven and day ten, when the crunch is still firm but the raw cabbage edge is gone.
You are looking for a few visual cues of success. The brine should be cloudy, not slimy. The color should be uniform, and the shredded cabbage should still have its structure. If you see a little bit of white film on top, that is kahm yeast, which is harmless but can taste slightly metallic. Just scrape it off.
Once refrigerated, your mason jar batch will keep for months. Honestly, it gets better with age. If you press it down well and always use a clean fork to grab a portion, it will stay crunchy and bright. Just remember that the jar will continue to build pressure, so burp it once a week by opening the lid to release any gas.
The Brass Tacks of Probiotics
Everyone wants to talk about the gut health benefits, and they are real. The lacto-fermentation process creates live probiotics, which are the good bacteria that your digestive system loves. A couple of forkfuls a day is a genuinely useful addition to your diet.
But I am not here to sell you a miracle cure. This is food, not medicine. The probiotic count in a fresh, unpasteurized batch of sauerkraut is far higher than anything you will find on a shelf, and the fact that it is absurdly cheap to make is a perk. It is my favorite way to add a little tang to a sandwich or a grain bowl.
One weird but effective tip I picked up? Freeze some of the brine from a successful batch. When you start your next batch of cabbage, use that liquid as a starter. It accelerates the process and gives the new batch a flavor boost. It is like planting a flag for your specific house bacteria, and it gives every new ferment a head start.
So, go find a cabbage and a mason jar. Pack it tight, trust the salt, and give it time. The result is a crunchy, tangy, alive condiment that you made with your own two hands. I promise you, the first time you crack open that lid and hear that faint hiss of pressure release, you will be hooked. Try one jar, and you will see exactly why the humble cabbage is still the king of the fermentation world.
Leave a Comment