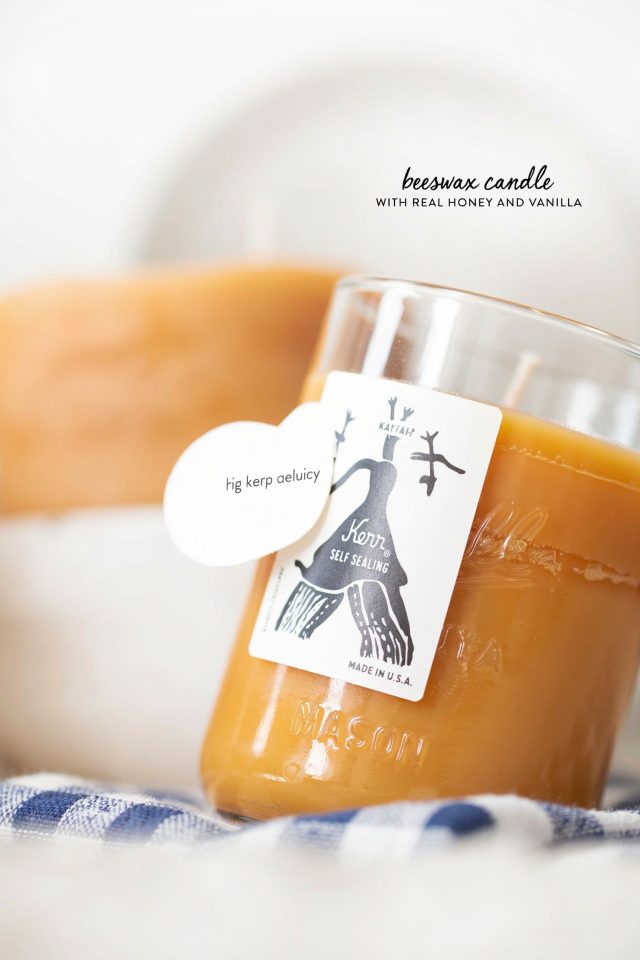
Why Choose a Beeswax Honey Vanilla Candle for Your Home
There is something deeply satisfying about making your own candles, especially when the result fills your home with a gentle, natural scent. A homemade honey vanilla candle made with raw beeswax offers a warm glow and a soft, comforting aroma that synthetic candles simply cannot match. The combination of sweet honey tones and smooth vanilla creates a cozy atmosphere perfect for reading, relaxing, or unwinding after a long day. This honey vanilla candle recipe uses only natural ingredients, so you never have to worry about artificial fragrances or unknown chemicals floating through your air.
Beeswax burns slower and cleaner than paraffin wax, which means your candle lasts longer and produces less soot. It also releases negative ions that help purify the air, making your homemade candle a healthy choice for your living space. When you add pure vanilla essential oil, you get a scent that feels both nostalgic and calming without being overpowering. This project takes less than an hour from start to finish, and it makes a thoughtful handmade gift for friends and family.
If you are new to candle making, do not worry. This recipe is straightforward and forgiving, even for beginners. You only need a few supplies, and I will walk you through every step so you can create a beautiful candle that smells like a warm kitchen on a crisp autumn afternoon.
Ingredients and Supplies for Your Beeswax Candle DIY
Before you start melting wax, gather everything you need. Having your supplies ready makes the process smooth and prevents any last minute scrambling. Most of these items are easy to find online or at a local craft store.
- Raw beeswax. You can buy beeswax in blocks, pellets, or sheets. Pellets melt faster and are easier to measure, but blocks work just fine if you chop them into small pieces. Use about 4 ounces for a standard 8 ounce jar.
- Vanilla essential oil. Look for pure vanilla essential oil or vanilla oleoresin. Avoid synthetic vanilla fragrance oils if you want a truly natural candle. The scent is rich and sweet, so a little goes a long way.
- Honey. Use raw, unfiltered honey if possible. The honey adds a subtle sweetness and helps bind the vanilla scent. You only need about one tablespoon per candle.
- Cotton wick. Choose a wick designed for beeswax candles. Beeswax burns hotter than other waxes, so a standard cotton wick with a medium thickness works well. A wick that is too thin may drown in the melted wax.
- Glass jar or candle container. Any heat safe glass jar works. Mason jars, small glass tumblers, or repurposed jam jars are perfect. Make sure the jar is clean and dry before you pour the wax.
- Double boiler or a makeshift setup. Beeswax melts best using indirect heat. A double boiler is ideal, but you can place a heat safe bowl over a pot of simmering water.
- Thermometer. A candy or candle thermometer helps you monitor the wax temperature so you do not overheat it. Beeswax should not exceed 185 degrees Fahrenheit.
- Wooden skewer or chopstick. You will use this to stir the wax and hold the wick in place while the candle sets.
That is really all you need. The ingredients are simple, and the supplies are affordable, especially if you already have a few glass jars lying around. This natural home fragrance project is budget friendly and does not require fancy equipment.
Step by Step Guide to Making Your Candle at Home
Now comes the fun part. Follow these steps carefully, and you will have a beautiful homemade candle ready to burn in under an hour. Work in a well ventilated area and keep children and pets away from the hot wax.
Step 1: Prepare your jar and wick. Place a small amount of melted beeswax or a glue dot on the bottom of your wick tab and press it into the center of your jar. Wrap the top of the wick around a wooden skewer or chopstick and rest it across the mouth of the jar. This keeps the wick straight and centered while the wax hardens.
Step 2: Melt the beeswax. Fill the bottom pot of your double boiler with a few inches of water and bring it to a gentle simmer. Place the beeswax in the top pot or bowl and let it melt slowly. Stir occasionally with your skewer. Do not walk away, beeswax can overheat quickly if the water gets too hot.
Step 3: Add honey and vanilla. Once the wax is completely melted and reaches around 160 to 170 degrees Fahrenheit, remove it from the heat. Stir in one tablespoon of raw honey until it is fully incorporated. The honey may cause the wax to bubble slightly, which is normal. Then add your vanilla essential oil. Start with about 30 drops for a single 8 ounce candle and adjust based on how strong you want the scent. Stir gently for about 30 seconds.
Step 4: Pour the wax. Let the wax cool slightly to around 150 degrees before pouring. Slowly pour the melted wax into your prepared jar, leaving about half an inch of space at the top. Tap the jar gently on the counter to release any air bubbles that may have formed.
Step 5: Let it set. Allow the candle to cool undisturbed at room temperature for at least 4 to 6 hours, though overnight is best. Do not put it in the refrigerator, as rapid cooling can cause cracks. Once the wax is fully hard, trim the wick to about one quarter inch above the surface.
That is all there is to it. The process is simple, and the result is a gorgeous, creamy beeswax candle with a gentle honey vanilla aroma that fills your space without feeling heavy.
How to Get the Best Scent Throw from Your Essential Oil Candle
One common question people ask is why their homemade candle does not smell as strong as store bought ones. The answer usually comes down to temperature and oil quality. Beeswax has a natural, mild honey scent of its own, so your vanilla notes need to be strong enough to come through without being muffled. Here are a few practical tips to maximize your candle’s scent throw.
Use high quality vanilla essential oil. Not all essential oils are created equal. Cheap oils often contain synthetic fillers that evaporate quickly or smell weak. Invest in a pure vanilla oleoresin or a reputable brand of vanilla essential oil. The difference is noticeable both during the pouring process and when you burn the candle.
Add the oil at the right temperature. If you add essential oil when the wax is too hot, the volatile scent compounds can burn off before the candle even sets. Let the wax cool to 160 degrees or lower before stirring in your oil. This preserves the fragrance and gives you a stronger aroma when the candle burns.
Give your candle time to cure. Beeswax candles actually benefit from sitting for a few days before you light them. The wax needs time to fully bond with the essential oil. If you burn your candle immediately after it hardens, the scent may seem faint. Wait 2 to 3 days for the best results.
Use the right wick size. A wick that is too small will create a small, weak flame that does not melt the wax pool fully. This limits the amount of scent released. A medium cotton wick designed for beeswax usually provides a good balance for jars that are 2 to 3 inches wide.
Do not overshoot the oil ratio. Adding too much essential oil can actually mute the scent or cause the candle to burn poorly. Stick to about 0.5 to 1 ounce of essential oil per pound of beeswax. More is not always better.
With these tips, your essential oil candle will fill a room with a warm, inviting fragrance that feels natural and never cloying.
Creative Ways to Customize Your Homemade Candle
Once you master the basic honey vanilla candle recipe, you can start experimenting with variations that suit your personal taste. The beauty of making your own candles is that you control every detail, from the container to the scent blend. Here are a few ideas to get you started.
Layer different scents. Try adding a few drops of lavender essential oil along with the vanilla for a floral honey lavender combination. Or mix in a touch of cinnamon or clove for a spiced winter candle. Beeswax pairs beautifully with warm, earthy scents, so do not be afraid to play around.
Use unique containers. Repurpose vintage teacups, small ceramic bowls, or even tin cans lined with wax. Just make sure the container is heat safe and stable. Clear glass jars let you see the beautiful golden color of the beeswax, which adds to the candle’s visual appeal.
Add dried herbs or flowers. Sprinkle a few dried lavender buds or rose petals into the bottom of your jar before pouring the wax. They will float gently in the melted wax and settle as the candle hardens. Keep in mind that dried plant material can be flammable, so use them sparingly and only near the bottom of the candle.
Make a layered candle. Pour a thin layer of beeswax, let it cool slightly, then add a second layer with a different scent. This creates a candle that changes fragrance as it burns down. It takes a little more time, but the result is impressive and fun to explain to guests.
Create a gift set. Pair your honey vanilla candle with a small jar of raw honey and a handwritten care tag. It makes a heartfelt gift for housewarmings, holidays, or just because. People appreciate the time and thought that goes into a handmade present.
Customizing your candle keeps the process fresh and gives you a chance to develop your own signature scent. You might find that you prefer a stronger honey note or a deeper vanilla warmth. That is the joy of making things yourself.
Tips for Burning Your Beeswax Candle Safely
Beeswax candles burn differently than paraffin or soy candles. They have a higher melting point, so the wax pool stays warm and the flame burns bright. To get the most out of your candle and keep your home safe, follow a few simple guidelines.
Trim the wick before each burn. A long wick creates a tall, smoky flame that can leave soot on your jar. Keep the wick trimmed to about one quarter inch. This also helps the candle burn evenly and last longer.
Allow the wax pool to reach the edges. On the first burn, let the candle melt wax all the way to the sides of the jar. This prevents tunneling, where a hole forms down the middle and leaves unmelted wax on the sides. For an 8 ounce jar, this usually takes about 1 to 2 hours.
Do not burn for more than 4 hours at a time. Beeswax holds heat well, and a long burn can cause the jar to get very hot. Give the candle a break between burns and let it cool completely before lighting again.
Keep the candle away from drafts. A draft can cause the flame to flicker and burn unevenly, which leads to soot and a shorter burn time. Place your candle on a stable surface away from open windows, fans, or air vents.
Never leave a burning candle unattended. This is the most important rule for any candle. Always keep it within sight and out of reach of children and pets. Place it on a heat resistant surface, and do not burn it near curtains, books, or other flammable items.
Beeswax candles are naturally dripless and produce very little soot when burned correctly, making them a safe and eco friendly choice for your home.
Why This DIY Natural Home Fragrance Is Worth Your Time
Making your own honey vanilla candle is one of those projects that feels both productive and relaxing. The process itself is soothing, from the gentle melting of the beeswax to the rich scent of vanilla filling your kitchen. You end up with a finished product that not only smells wonderful but also reflects your personal effort and care.
This honey vanilla candle recipe is a perfect starting point if you want to explore natural home fragrance without relying on store bought products full of synthetic ingredients. The materials are simple, the steps are easy, and the result is genuinely beautiful. Once you try it, you may find yourself making candles for every room in your house.
If you give this recipe a try, I would love to hear how it turns out. Share your experience, tag your photos with #honeyvanillacandle or #beeswaxcandlediy, and let others see what you created. There is a whole community of people who love making their own natural home fragrance, and your candle might inspire someone else to try it too. So grab your beeswax, find a cozy jar, and let the warm aroma of honey and vanilla fill your home. Happy candle making.
#honeyvanillacandle #beeswaxcandlediy #naturalhomefragrance #homemadewithlove #essentialoilcandle