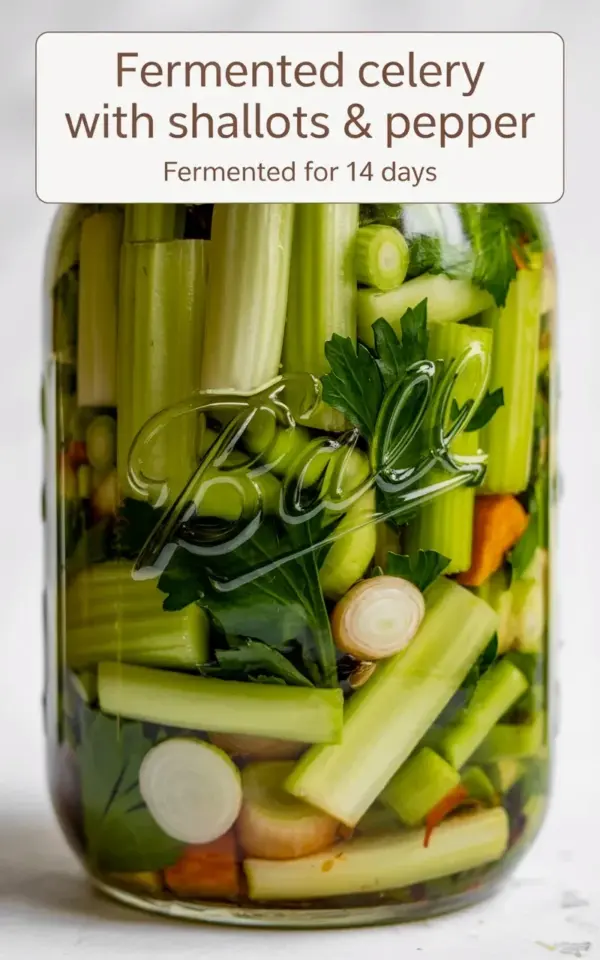
I have been staring at this jar on my counter for the last two weeks. A regular glass mason jar, filled with green celery slices, little white shallots, some parsley leaves, and a scattering of black pepper flecks. It has a white label that says “fermented celery with shallots & pepper – fermented for 14 days.” And honestly? I did not expect such a dramatic change. The transformation of this fermented celery with shallots & pepper from crunchy stalks in brine to a tangy, fizzy probiotic powerhouse is genuinely something else. It went from looking like a sad refrigerator experiment to being the most alive, bubbly thing in my kitchen. So here is exactly how I did it, what I learned, and why you should probably try this too.
Why Fermented Celery Deserves a Spot on Your Counter
Look, I have made sauerkraut. I have done the whole kimchi dance. But celery? That felt weird at first. Celery is so … watery. So crisp. I was convinced it would turn into a limp, sad mess. I was wrong. Fermented celery retains a surprising amount of crunch, even after two weeks. The texture shifts slightly, it gets a little more tender, but it stays snappy. And the flavor? Not gonna lie, the brine does something magical to that vegetal celery taste. It mellows out the harshness and brings forward a subtle, almost floral note. The shallots mellow into something sweet and garlicky-adjacent. The pepper gives a gentle warmth. You end up with a probiotic snack that tastes like a really fancy pickle, but you made it for pennies.
One weird thing I noticed. The color. Fresh celery has that bright, almost neon green. After fermentation, it fades to a more muted olive tone. It looks more like something you’d find in a rustic deli than a grocery store. I honestly like it better that way.
The 14 Day Process: What Actually Happens Inside the Jar
So here is the timeline. Day one, you pack the jar. It looks pretty but boring. Just vegetables in salt water. Day two through four, nothing dramatic. Maybe a tiny bubble or two. You start worrying you messed up. Day five? That is when things get active. The brine turns slightly cloudy, which is good. That is the lactic acid bacteria doing its job.
By day seven, the liquid has this faint effervescence. You open the lid and hear a tiny puff of air. Not a pop, just a soft release. Day ten is where the real personality shows up. The smell shifts from salty vegetable water to something tangy, almost like a mild yogurt or sourdough starter. Day fourteen? The jar is alive. The brine is bubbly, the celery has that signature tang, and the shallots have turned translucent and soft. I held the jar up to the light (like a weirdo, I know) and watched the bubbles rise. Satisfying.
A note on that fizz. It is subtle. Do not expect soda-pop levels of carbonation. It is more like a very gentle sparkle on your tongue. If you want more fizz, let it go to day seventeen or eighteen. But fourteen is my sweet spot. The balance of tang and texture peaks right there.
Exact Ingredients for This Probiotic Vegetable Ferment
You do not need fancy equipment. Here is exactly what I used:
– Celery. About 4 large stalks. Slice them thin, like a quarter inch thick. Too thick and the brine takes forever to penetrate. Too thin and they turn mushy.
– Shallots. 3 small or 2 medium. Peel them and slice into thin rounds. They add a subtle sweetness that balances the celery.
– Fresh parsley. A generous handful of leaves. I used flat-leaf parsley. Curly works too but flat breaks down more gracefully.
– Black peppercorns. A full teaspoon, slightly cracked. I used a mortar and pestle but the bottom of a skillet works fine.
– Salt. Non-iodized. I use fine sea salt. You need about 2% of the total water weight. For a standard quart jar, that is roughly 2 teaspoons.
– Water. Filtered or distilled. Tap water with chlorine will kill the fermentation. Do not risk it.
One little personal complaint here. Chopping shallots makes me cry every single time. I do not know why shallots hit me harder than onions, but they do. I was sniffling over my cutting board like a fool. Totally worth it though.
Step by Step: How to Make Fermented Celery at Home
This is stupidly simple. I am not kidding. You literally do four things.
First, make your brine. Dissolve 2 teaspoons of salt into 4 cups of filtered water. Stir until completely clear. Taste it. It should taste like the ocean but not undrinkable. If it is too salty, dilute it slightly. Too bland, add a pinch more salt. Trust your tongue on this one, your gut bacteria will sort out the rest.
Second, pack the jar. Layer the celery, shallots, parsley, and cracked peppercorns into a clean glass mason jar. Do not ram them down. You want some space for the brine to circulate. Leave about an inch of headspace at the top. Pack them gently, like you are arranging a tiny vegetable puzzle.
Third, pour the brine over everything. Submerge all the vegetables completely. Use a weight if you have one. I used a small glass ramekin that fit perfectly inside the jar lid. If you do not have a weight, a ziplock bag filled with extra brine works too. Anything that keeps the vegetables under the liquid. Mold is your enemy, submersion is your friend.
Fourth, cover loosely with the lid. Do not tighten it. Gasses need to escape. I left the lid on fingertip-tight and burped it daily. Some people use a fermentation lid with an airlock. I do not bother. Just set it on your counter, out of direct sunlight, and forget about it for a few days. Check on it. Taste a piece of celery on day five. See how it is evolving.
What to Look For: Visual Cues Over 14 Days
Not gonna lie, the first time I fermented something, I panicked every single day. Is that cloudiness bad? Are those bubbles normal? Here is what to actually look for.
Good signs: A slightly cloudy brine. Bubbles rising to the top. A sour, tangy smell that is pleasant, not rotten. The celery turning a duller green. A thin white layer on top of the brine is okay, that is yeast. A fuzzy, colored mold is not okay. Scrape off the yeast if you want, but I usually let it be.
Bad signs: Pink or green mold. A smell like garbage or vomit. Slime on the vegetables. Any of these mean toss it and start over. I have fermented maybe twenty batches of various vegetables and only lost one to mold. It was a kale ferment that I forgot to weigh down. Rookie mistake.
Here is a quick checklist I keep in my head:
– Cloudy brine after day four? Good, bacteria are working.
– Bubbles after day six? Excellent, fermentation is active.
– Smells like pickles by day ten? Perfect, you are on track.
– Celery tastes tangy and fizzy by day fourteen? You did it.
How to Use Your 14 Day Fermented Celery
Ok so here is the fun part. You made this jar of probiotic goodness. Now what? I have been eating it straight out of the jar, honestly. Just grabbing a few slices with a fork as a snack. It is great on a cheese board, the tang cuts through rich cheese beautifully. I chop it up and toss it into tuna salad for a crunchy, fermented kick. My favorite use though? On a sandwich. Specifically a turkey and avocado sandwich. The acidity of the celery replaces the need for any condiment. It adds texture, flavor, and gut health in one bite.
You can also blend the leftover brine into salad dressings. Swap it for vinegar in a vinaigrette. Or drink a tablespoon of the brine straight for a probiotic shot. It is salty and sour. Not for everyone, but I love it. The brine keeps fermenting slowly in the fridge, so it gets more tangy over time. Use it within two to three months for best flavor.
One weird thing I did last week. I diced the fermented celery fine and mixed it into egg salad. The fizz was gone by that point but the tang remained. It was excellent. My partner said it was the best egg salad I ever made. High praise.
Why This Is Better Than Store Bought Probiotic Veggies
Look, I buy sauerkraut from the store sometimes. I am not a purist. But homemade fermented celery has a few things going for it. First, cost. A jar of fancy fermented vegetables costs eight to twelve dollars. My batch of celery cost maybe two dollars total, including the shallots. Second, control. I decide how salty, how peppery, how long to ferment. I like things tangy so I push it to fourteen days. You might prefer a milder version at ten days. You get to choose.
Third, and this is the big one for me, freshness. Store bought ferments are pasteurized sometimes, killing the probiotics. Or they sit on a shelf for months. My jar went from counter to fridge in two weeks. The bacteria are alive, active, and abundant. I cannot guarantee that from a jar that traveled across the country.
Also, it is genuinely satisfying to open that lid on day fourteen and smell the results of your patience. It sounds cheesy, I know. But there is a real pride in making something that transforms itself. You just set the stage, the microbes do the work. You get to take the credit.
Make a jar this weekend. Put it on your counter. Mark your calendar for fourteen days from now. Open it, taste it, and see what you think. I bet you will be surprised. And if you are not, well, you wasted two bucks and ten minutes of prep. That is a risk worth taking for gut health and a fun kitchen experiment. Try it and let me know how it goes.
#fermentedcelery #probioticfoods #homemadeferment #guthealth #vegetableferment