So, you’ve decided to ferment celery. Honestly, that’s a smart move and not the most common one, which is exactly why I love it. Most people jump straight to cabbage or cucumbers, but there’s a whole world of crunchy, tangy possibilities sitting in your crisper drawer right now. This fermentedcelery recipe has been living in my fridge for months, and the 14-day wait is absolutely worth it.
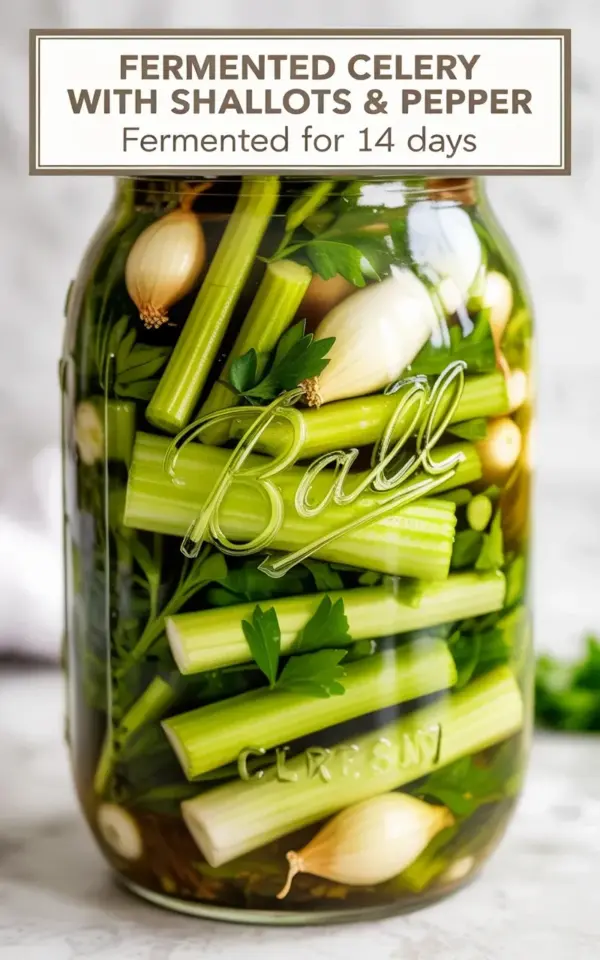
The jar in the photo shows my latest batch, complete with the little white label and a cross-stitch aesthetic. You can see the pale green celery slices, the small white shallots, and those dark, frilly parsley leaves all suspended in that cloudy, active brine. It looks alive, because it is. It gives me a little thrill every time I open the fridge and see it sitting there, waiting for its moment on a cheese board or chopped into a salad.
Look, fermentation feels like a magic trick, but it’s really just science and time. You create the right environment, salt that good bacteria loves, and let nature do the heavy lifting. But the real trick is learning to trust your senses and your jar. Not gonna lie, the first few times you do this, you’ll probably obsess over every tiny bubble. We all do.
Your job is just to keep everything submerged and let those beneficial bacteria, the probiotics, get to work. That’s what turns that plain old celery into something extraordinary. Let’s get into the nitty-gritty of how to pull this off in your own mason jar fermenting setup.
## Why This Celery and Shallot Combo Actually Works
Here’s the thing: celery has a high water content and a fairly mild flavor. On its own, it can sometimes ferment into something a little flat or just taste like salty, pickled water. The secret to a great batch is giving it friends with more character. Shallots bring that gentle, sweet, garlicky onion note, and parsley adds a fresh, slightly peppery greenness.
The texture is the real selling point here though. Celery holds onto its crunch remarkably well in a brine. Even after 14 days on the counter, you get that satisfying snap when you bite into it, but the inside becomes tender and infused with the tangy liquid. It’s a completely different experience from eating a raw stalk.
I also like to add a little kick. The label on my jar says “with pepper,” and I always throw in a few whole black peppercorns and a dried chile or two. It doesn’t make it spicy, it just adds this subtle warmth that makes the whole jar taste more complex. Honestly, you won’t miss the heat, but you’d notice if it was missing.
## Gathering Your Mason Jar Fermenting Supplies
Before you even think about slicing, get all your equipment ready. Fermentation isn’t a time for scrambling around your kitchen trying to find a funnel with dirty hands. This is the one part of the process where a little prep goes a long way.
Here’s your check list:
– One 1-quart (32 oz) mason jar, plus a second smaller jar to use as a weight or a dedicated glass fermenting weight.
– A fermentation airlock lid or just a regular mason jar lid that you can “burp” (loosen) daily.
– Fine sea salt or kosher salt. Do not use iodized salt, it can mess with the good bacteria.
– A clean cutting board, a sharp knife, and a vegetable peeler if you want to get fancy.
Honestly, you don’t need a lot. One of the reasons I love mason jar fermenting is that it’s an accessible hobby. You probably have everything you need sitting in your cabinets right now. The most important tool isn’t something you buy, it’s a bit of patience.
## Step-by-Step: Building Your Fermentation Recipe
Ok so, let’s talk about the process. It’s honestly easier than making a complicated salad, but there are a couple of zones that matter. First, the cut. Slice your celery into thin, uniform pieces, maybe a quarter-inch thick. This increases the surface area for the brine to work its magic.
Next, layer it. When you’re packing the jar, you want to alternate the celery, peeled and halved shallots (or sliced if they’re huge), and handfuls of flat-leaf parsley. Pack it all in there pretty tight. You want to get as much as you can into the jar because it will shrink as it ferments.
For the brine, the ratio is key. I use a 2% to 3% salt solution. That means 20 to 30 grams of salt per liter (or quart) of water. It’s way easier if you use a kitchen scale, but if you don’t have one, use about 1.5 tablespoons of salt per quart of water. Whisk it until it’s fully dissolved.
Pour the brine over your packed vegetables until they are completely submerged. This is crucial. Any celery sticking out above the liquid is a magnet for mold. Leave about an inch of headspace at the top of the jar. Use your glass weight to keep everything down, or, a trick my grandma used, just tuck a smaller jar filled with water inside the mouth of the big jar to hold the veggies below the brine line.
## The 14 Day Wait, Burping, and Troubleshooting
Now you put that jar somewhere out of direct sunlight, somewhere at room temperature, and you wait. You are looking at a 14-day fermentation, but that’s just a guideline. The first two or three days, you’ll see the brine start to get cloudy, that’s the good bacteria waking up and multiplying.
You’ll also see tiny bubbles, and that is a fantastic sign. If you’re using a regular lid, you need to open it every day to let the carbon dioxide escape. I forgot once and had a geyser of salty celery juice all over my pantry wall. That’s why I recommend an airlock lid, but they aren’t a necessity. Just don’t skip the “burping” step if you use a normal lid.
At day three, you might see a white film form on the surface. That’s kahm yeast, and it’s harmless. You can just skim it off. However, if you see fuzzy mold, especially something black or green, that batch is ruined. Toss it and start over. Don’t risk it.
Here’s the thing most guides won’t tell you: the flavor changes dramatically between day seven and day fourteen. At day seven, it’s just a salty, vegetal pickle. At day fourteen, it develops that deeper, tangy, lactic acid flavor, a real sourness that makes it unmistakably fermented. Taste a piece every few days to see how it evolves. That’s the fun part.
## Probiotics and Health Benefits You Can Clearly Feel
We all know we should eat more fermented foods for the probiotics. The good bacteria in this homemadeferments project are great for your gut and digestion. It’s not just some vague, abstract health trend though; when you eat a spoonful of this stuff, it genuinely feels like your stomach wakes up.
The process of lacto-fermentation creates living bacteria that survive the journey to your gut. These little guys help break down food and keep your microbiome balanced. It’s a simple, ancient way of preserving food that also adds a powerful health boost to your dinner plate.
One thing to keep in mind is that fermented foods are not pasteurized. If you heat them, you kill the beneficial bacteria and all that good stuff we just talked about. Eat it raw! Add it to a grain bowl, chop it into tuna salad, or just eat it straight out of the jar when you’re feeling peckish. It’s a snack that’s actually doing you a favor.
## Recipe Variations and What to Do With the Final Product
Once your 14 days are up and you’re happy with the tang, pop the jar in the fridge. That cold temperature essentially stops the fermentation process in its tracks. It will keep for months, but trust me, it won’t last that long. The jars never make it more than a few weeks in my house.
So what to do with all of this crunchy, salty, tangy goodness?
– Chop it finely and stir it into yogurt or mayo for an instant, flavor-packed dip.
– Add a spoonful to a Bloody Mary or a dirty martini for a savory, umami twist.
– Layer it onto a sandwich with grilled chicken, tomato, and a smear of mustard.
– Use it as a relish to cut the richness of a fatty pork chop or a fried egg.
Don’t be afraid to play with the formula either. Swap the parsley for celery leaves and add a sliver of fresh ginger. Throw in some fennel seeds or coriander. The basic brine-to-veg ratio is forgiving, and the flavor possibilities are endless. That’s what makes this such an addictive hobby.
Grab a bunch of celery on your next grocery run, seriously. A 14-day wait sounds like forever, but when you finally crack open that jar and get that perfect sour snap, you’ll completely understand the hype. The process is simple, the result is impressive, and you are genuinely taking control of the food on your table. Your future gut will thank you, and honestly, you deserve that satisfying little crunch.
Leave a Comment