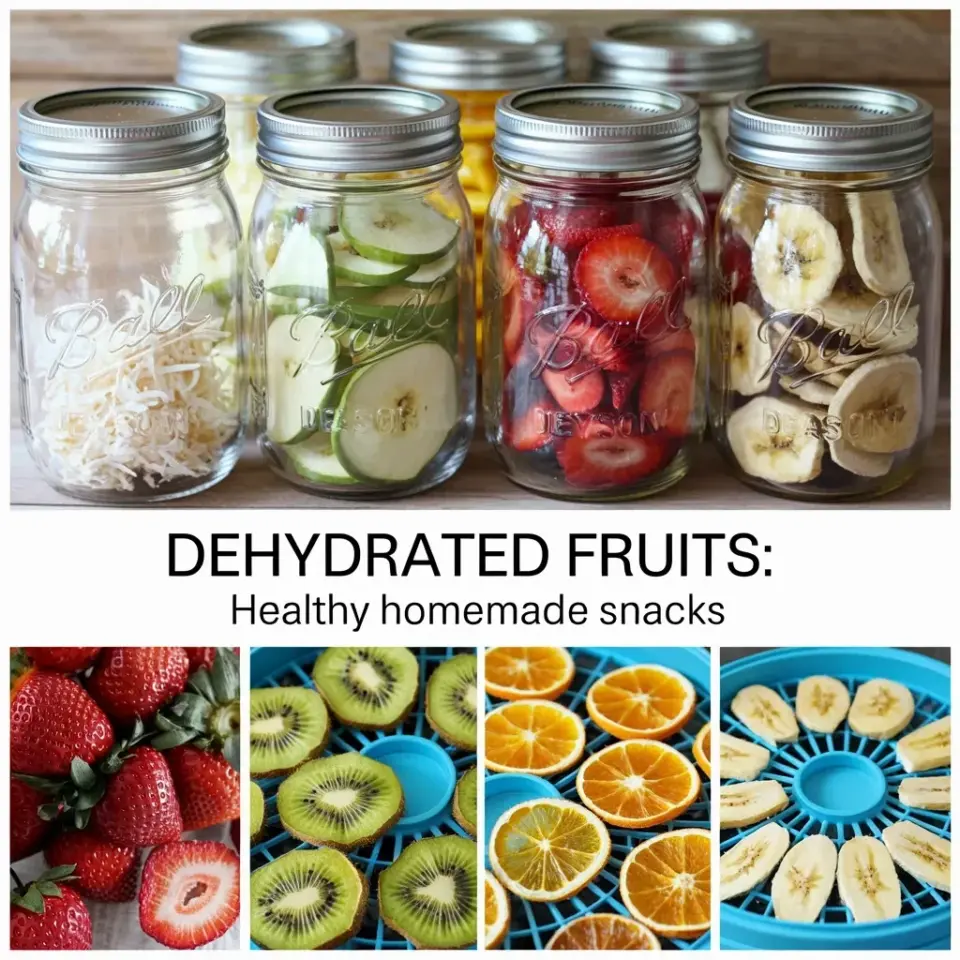
Look, you’ve probably got a food dehydrator sitting in the back of a cabinet, half-forgotten, or you’re finally thinking about pulling the trigger on buying one. Either way, dehydrated fruits are the ultimate lazy-healthy win, and the mason jar is their perfect home. That glass jar look, where the apple rings, strawberry slices, bananas, and citrus all stack up in neat rows, is not just Pinterest pretty. It’s practical. It’s grab-and-go, it’s pantry-stable, and it means you stop buying those overpriced dried fruit packets from the gas station.
Honestly, when I see a photo of five glass mason jars filled with white coconut flakes, green apple rings, yellow citrus wheels, red strawberries, and beige banana chips, I feel a little thrill. That’s the exact lineup from the photo we’re talking about, and it’s a gorgeous snapshot of what a successful dehydrating batch looks like. Here’s the thing: you don’t need a fancy setup or a ton of time. A few hours of patience, a sharp knife, and a good playlist, and you’ve got a pantry that looks like a healthy snack boutique. Let’s get into how to actually do it, step by step.
The Right Prep for Crispy Apple Rings
Apples are the gateway fruit for a reason. They’re cheap, they slice evenly, and they taste phenomenal when they’re dried with a dusting of cinnamon. To make the rings from that photo, a firm green apple like Granny Smith works best because it holds its shape and doesn’t brown as quickly as some sweeter varieties.
Core the apples first, then slice them into rounds about a quarter-inch thick. Not thinner, they’ll turn into fragile shards that crumble in the jar. Not thicker, they’ll take forever to dry and might end up chewy in the center. Toss the slices in a little lemon juice and water bath for about five minutes to keep that bright green color, then pat them dry.
Arrange them on the dehydrator trays in a single layer. Make sure the rings aren’t overlapping, you want that good airflow. Sprinkle with a mix of cinnamon and a tiny pinch of nutmeg. Dry at 135°F for roughly six to eight hours. They’re ready when they feel leathery but still have a slight bend. If they snap like a cracker, they’re overdone, but that’s actually fine if you like them crunchy.
Strawberry Slices That Don’t Turn to Dust
Strawberries are the divas of the dehydrator world. They shrink a ton, they take forever if the slices are too thick, and they get so light that they fly around the tray if you have a strong fan. The trick is to slice them vertically, stem to tip, about a quarter-inch thick. Uniform thickness matters more for strawberries than any other fruit I’ve tried.
Hull them first, obviously. Then lay the slices flat and dry at 125°F for about eight to ten hours. Yes, it’s a long time. No, you can’t rush it. The edges will crisp up while the centers stay slightly tacky, that’s the texture you want for snacking.
One weird detail, dried strawberries are incredibly loud when you bite into them. Like, distractingly crunchy in a quiet office. It’s not a problem, just a heads-up if you’re planning to eat these at your desk. They’re worth it though, way more intense flavor than the store-bought ones that taste like nothing.
Banana Chips with a Tangy Twist
Banana chips are everyone’s favorite, but the store-bought ones are usually deep-fried in coconut oil and coated in sugar. Homemade ones are a completely different food, I swear. Slice ripe but still firm bananas into half-inch rounds. If they’re too mushy, they’ll stick to the tray and be a nightmare to peel off.
Here’s the trick that changes everything: dip the banana rounds in a bowl of lemon juice mixed with a teaspoon of salt. The salt sounds weird, but it balances the sweetness and prevents that cloying banana flavor from being overwhelming. It’s the same trick pineapple does with salt, it just makes it taste brighter.
Dry the bananas at 135°F for about eight hours. They’ll shrink a lot, so don’t expect a full tray to stay full. And here’s my biggest complaint with homemade banana chips: they don’t stay crispy long. The moment you seal them in a jar, they soften up and get chewy. That’s honestly fine for snacking, but if you want crunchy, you need to eat them within 48 hours or store them in a vacuum-sealed jar.
Citrus Rings for a Zesty, Bright Boost
Citrus is the dark horse of the dehydrated fruit world. The photo shows yellow rings, likely lemons, but oranges are the real stars here. You slice them whole, skin and all, into thin rounds. Like, paper-thin, maybe an eighth of an inch. The pith is bitter when raw, but once dried, it transforms into this sweet-tart candy with an intense concentrated flavor.
Oranges are the best choice because they’re sweet enough to balance the bitter pith. Lemons and limes are more for adding to teas or steeping in water rather than eating straight. Dry citrus at 115°F to preserve those delicate oils and that bright Vitamin C. It takes about six to ten hours depending on how juicy they are.
I’m just going to say it, a dehydrated orange ring is the best car snack ever invented. It’s messy, it’s sticky, and it leaves a weird bitter residue on your fingers, but it keeps you awake on long drives like nothing else. Not gonna lie, it’s a strange addiction.
The Secret to Shredded Coconut in Your Jar
That white shredded coconut in the top image is the least flashy item in the lineup, but it’s the most versatile. You can buy pre-shredded unsweetened coconut and dry it further, or you can crack open a fresh coconut and shred it yourself. Honestly, the store-bought version is totally fine here.
If you’re using fresh coconut, drain the water first, crack it open, and peel the brown skin off the meat. Then shred it with a box grater or a food processor. It needs much less time than the other fruit, just three to four hours at 125°F.
The key sign it’s done is when it’s dry to the touch but still has a hint of creamy texture when you chew it. You want a little give, not a dried out sawdust situation. Keep it in a jar away from direct light, since the oils can turn rancid if it gets too warm. It’s a good base for mixing with dried berries for a homemade trail mix.
How to Layer a Mason Jar Snack Setup That Works
Okay, the aesthetic in the photo is great, five identical jars lined up, labeled, ready to go. But let’s be real about layering. If you mix everything together, the moisture from the apples will soften the crispy banana chips. Separate jars at first, then mix them together right before you eat.
A standard wide-mouth mason jar holds about four to five cups of dried fruit, which is way more than you think. It’s a solid amount for a week of snacks for one person. Also, throw a silica gel packet or two into the bottom of each jar. It sounds overkill, but it absorbs any residual moisture and keeps everything fresher way longer.
The beauty of the glass jar is that you can see exactly what you have. No more mystery containers at the back of the pantry. No more plastic bags splitting and leaking crumbs everywhere. Just color-coded jars with metal lids, like a homemade apothecary for snacks. And honestly, that visible organization makes me way more likely to reach for dried fruit over a bag of chips.
A Few Flavor Boosters to Rotate and Try
If you’re bored with plain fruit, here’s where you can get creative. These are simple, mix-and-match ideas that keep the dried fruit from feeling repetitive.
– Sprinkle chili powder and lime juice on mango slices before drying. Sweet, spicy, and salty all at once.
– Toss apple rings in a little maple syrup and a big pinch of cinnamon. The syrup helps the cinnamon stick and adds a different type of sweetness.
– Blend shredded coconut with a tiny bit of vanilla extract and a pinch of salt. Bake it low and slow to keep it white.
– Zest an orange over the strawberries before you dry them. The citrus oils add a subtle floral note.
That last one is my personal oddball favorite. There’s something about that orange-blossom scent with the deep strawberry flavor that’s completely different from anything you’d taste in a commercial product. Experiment with a single tray first before committing a whole batch to a new idea.
The whole process is less about perfection and more about what you actually like to eat. Maybe you hate the banana chips, whatever, skip them next time. The point is that you’re filling this jars with real, whole food that you made, and it’s there when you need it. So next time you walk past that dehydrator, grab your fruit, slice it thin, set the temp, and let the machine do the work. Then, when it’s done, fill those glass jars and stick one on your desk or in your bag. Future you will be very glad you did.
Leave a Comment